When you enter a transaction on TRYTN, you have the option to take immediate payment or send your customer an invoice. The following article details the steps required to set up payment collection via invoice.
Related Articles:
Whether you're in the process of creating a new transaction or editing an existing one, choosing the method of payment will always take place on the Review screen (see Enter a New Transaction or Edit an Existing Purchase for instructions).
STEP 1: Select the Invoice Payment Option
As you confirm the transaction details, you will see a grey box on the right side of the screen (indicated below) where you can select how and when the payment will be collected.
To send your customer an invoice via email, you will want to select the option labeled Invoice - Customer pays later.
Note: Each time you create a new transaction, the payment setting will initially be set to your most recent selection. For example, if your last transaction was set up via card reader, this will automatically be selected when you go to make a new transaction. Be sure to review this option to select the appropriate means of payment with each new transaction you create.
Tax Exempt Purchase: Select this checkbox to indicate a purchase that is exempt from taxes or fees.
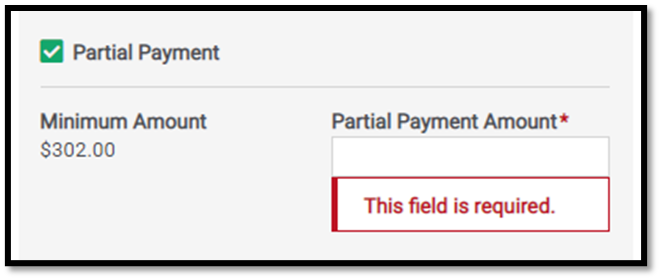
Partial Payment: Select this checkbox to enter a partial payment amount. The outstanding balance will be automatically calculated and displayed as this section is updated.
Note: The minimum amount required for a partial payment is 2x the service fee.
STEP 2: Enter a Recipient Email Address
When you choose to invoice a customer for a transaction, you must enter a recipient email address (under Buyer Information) to automatically send the invoice.
STEP 3: Send Invoice Email
Once an email address is entered, you will see an option to Send Invoice Email further down on the page, just above the green action button.
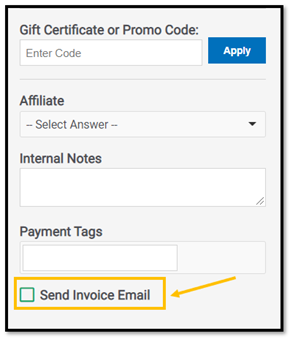
Select this checkbox and then click the green Send Invoice button to save your changes and have the invoice emailed to the address provided.
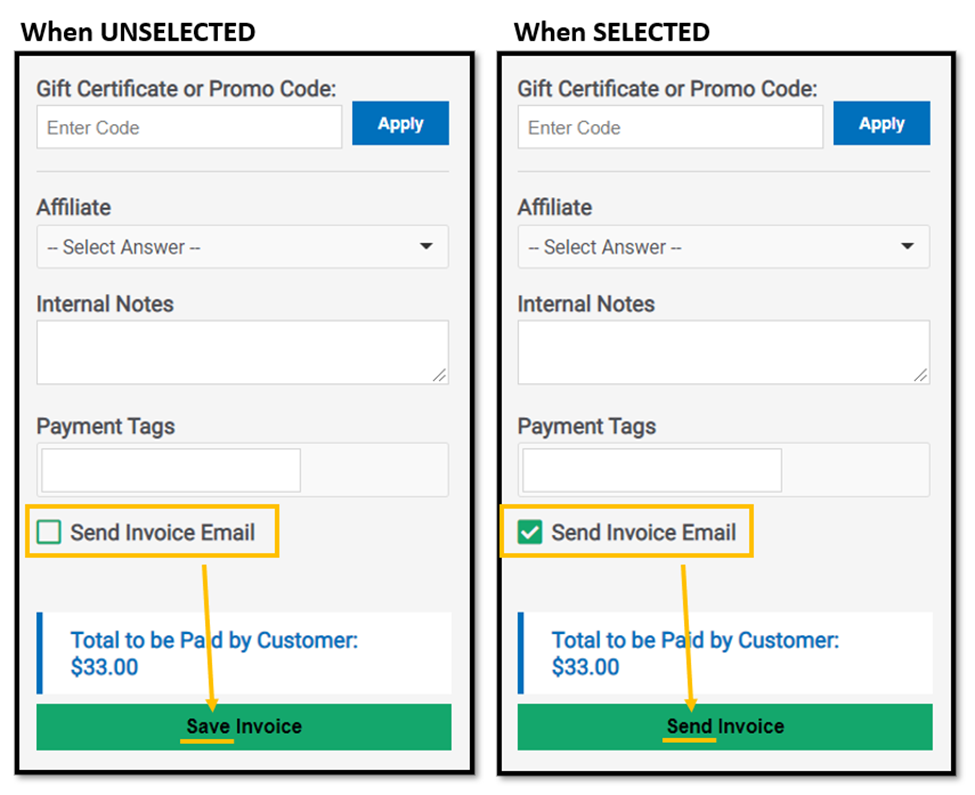
IMPORTANT: If you click the checkbox to Send Invoice Email, the green action button at the bottom of the page will read “Send Invoice.” When clicked, this option automatically sends an email to the customer with an invoice link.
*Note: The customer's spot in the activity is not reserved until they finalize payment through the invoice link. If the checkbox is not selected, the action button will instead say “Save Invoice,” and no email will be distributed. See example below.
**If an invoice email is undeliverable, you will receive a notification email informing you about the unsuccessful delivery of the invoice email.
-----
You can locate your created invoices on the far lefthand side of your TRYTN account:
When you navigate to Invoices, you will see your list of invoices created and the buyers name, invoice date, amount and status for each one. An invoice has three statuses: draft, queued, and outstanding.
- Draft: A draft invoice is one that has been created but not yet finalized or sent to the recipient. It’s essentially a work-in-progress. You might still be editing details. Once you’re satisfied, it moves to the next step (like being sent or queued).
- Queued: A queued invoice is one that’s been finalized and is scheduled or lined up to be sent to the recipient, but it hasn’t been delivered yet.
- Outstanding: An outstanding invoice is one that has been sent to the recipient but hasn’t been paid yet.
Once the invoice is sent out, received by a client and paid, it will become a payment and no longer be an invoice.